
Software Installation Steps#
VS Code#
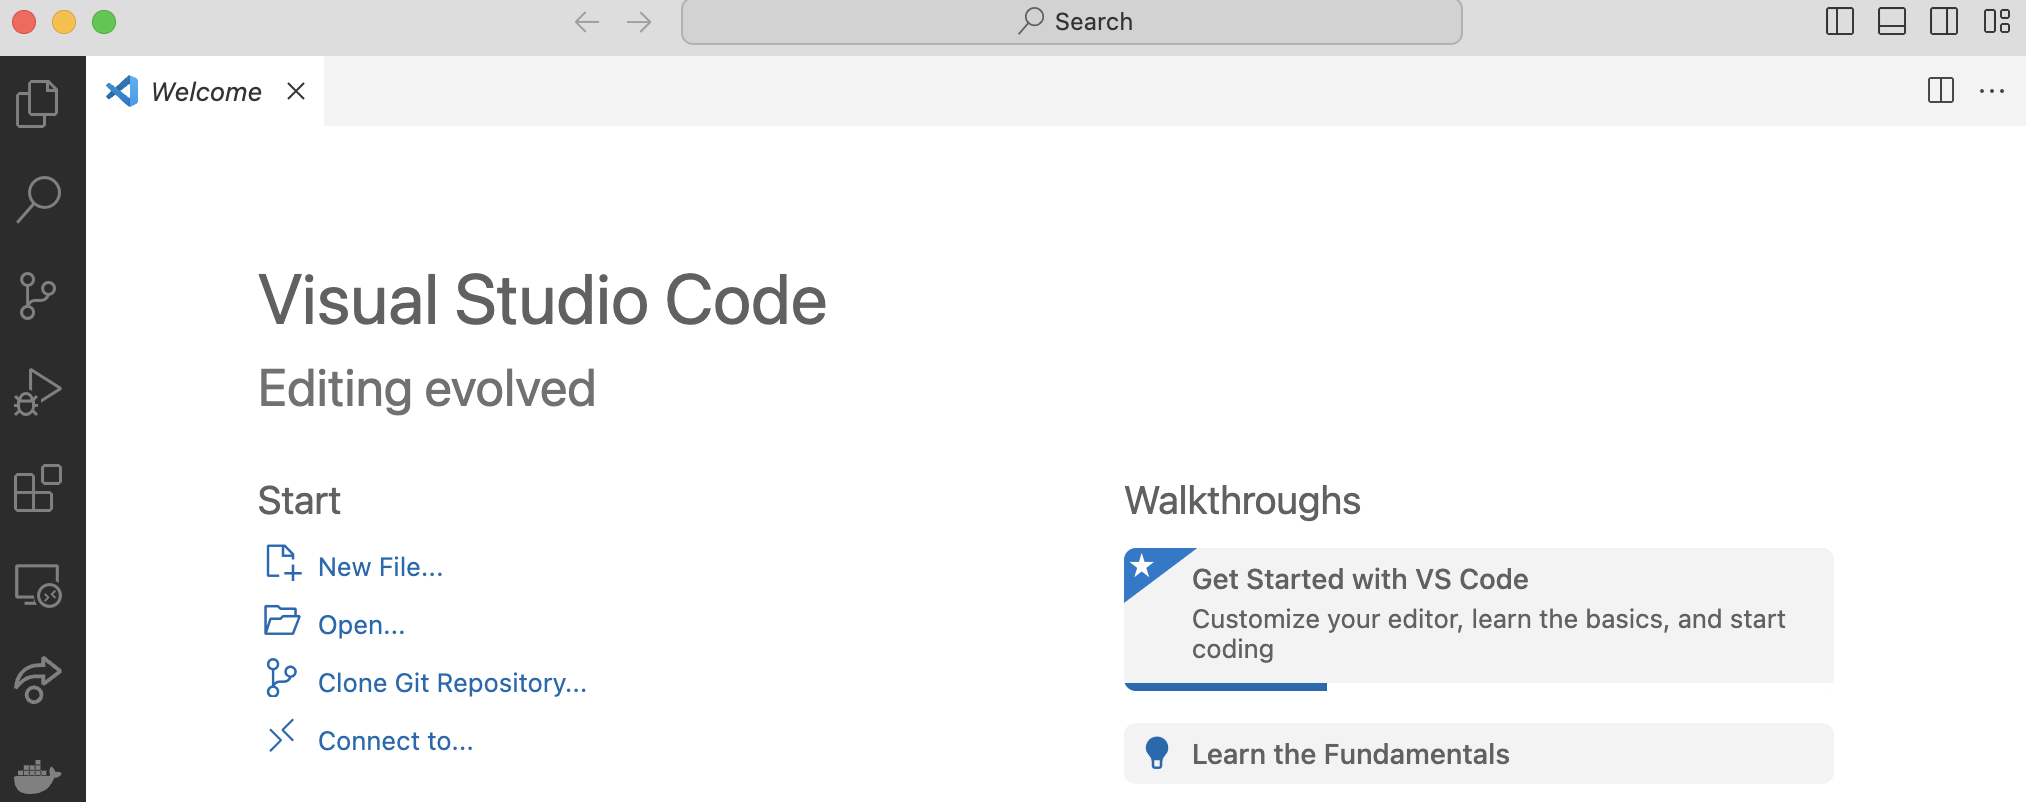
Fig. 2 A representation of VS Code Interface.#
Installing VS Code#
Download VS Code from https://code.visualstudio.com/download and choose your OS (Windows, Mac, or Linux).
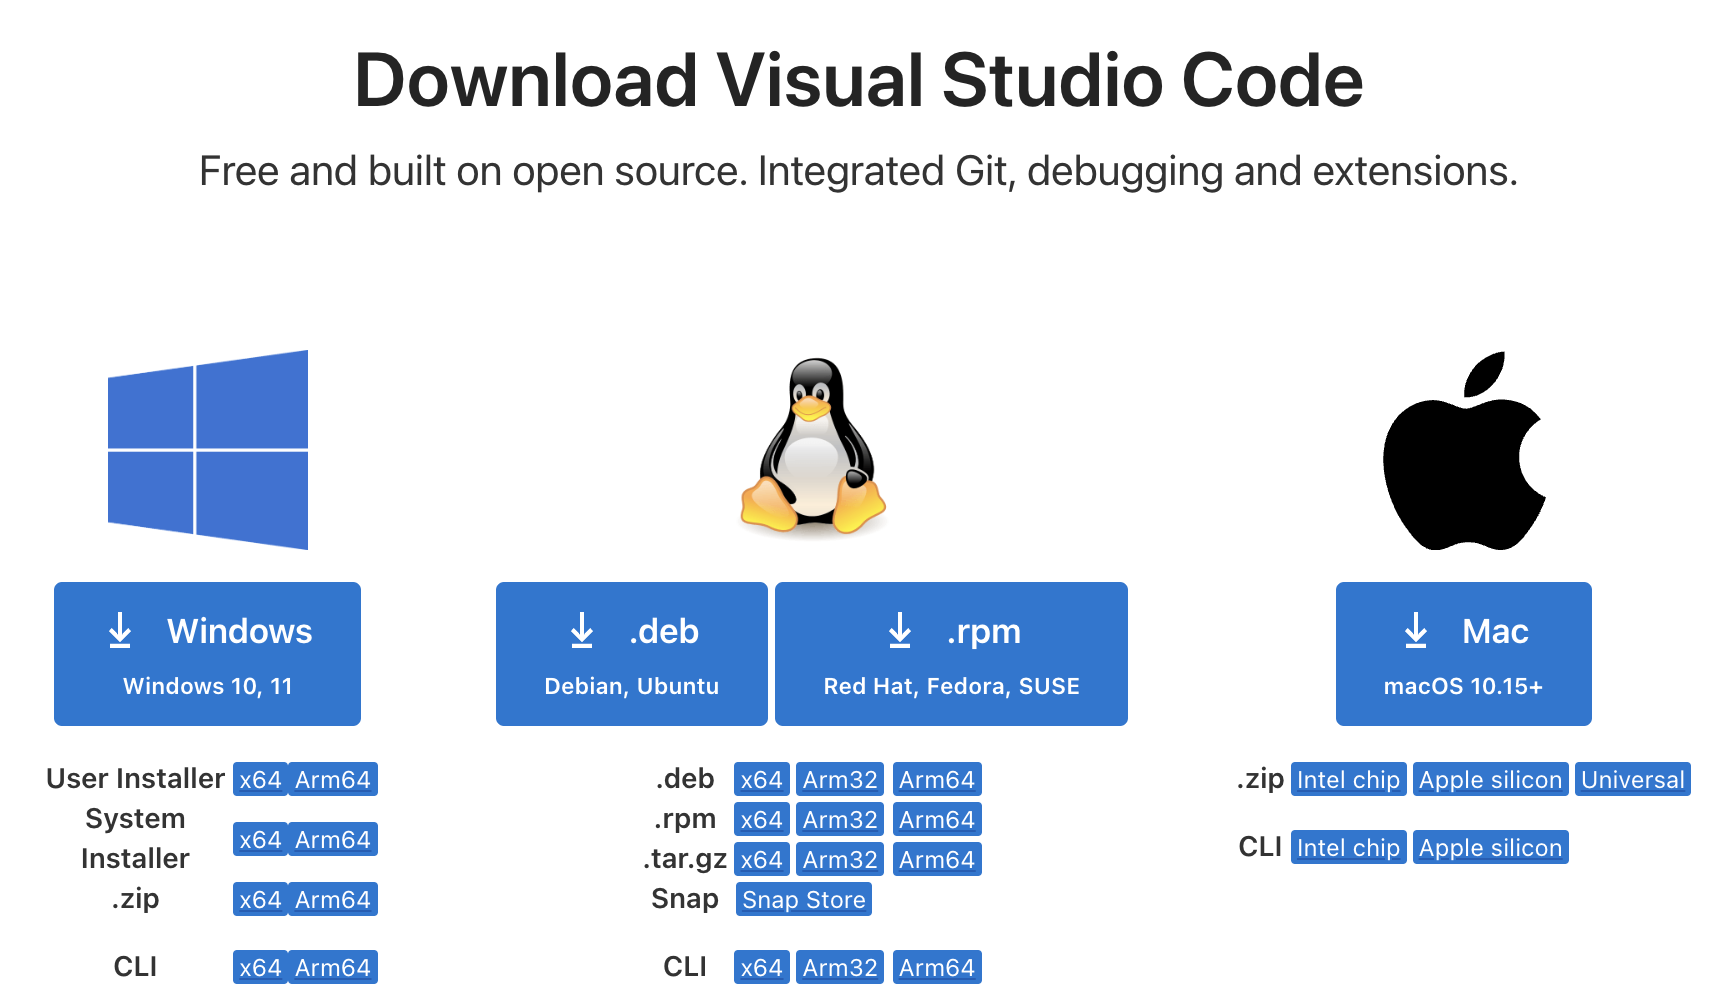
Fig. 3 A representation of VS Code Installation page.#
Important
Make sure you are installing Visual Studio Code, and NOT Visual Studio.
Installing Extensions#
The Python Extension#
The Python extension in VS Code is not Python itself, but rather a tool that enhances code development with features like syntax highlight, smart code suggestions, integrated debugging, and linting to catch errors early. It also supports virtual environments which we will need to manage our project dependencies.
Open VS Code and click on the extensions button in the activity bar on the left side of the screen.
Search for “Python”
Select the official Python extension and click its “Install” button.
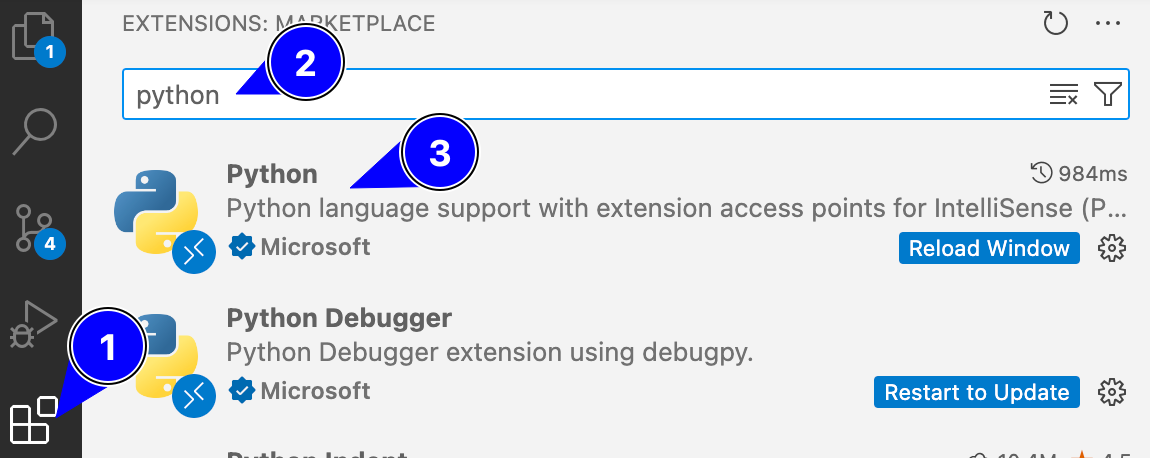
Fig. 4 A representation of Python Extension Installation steps on VS Code.#
The Live Share Extension#
Live Share extension in VS Code enables real-time collaboration by allowing multiple developers to share and edit code simultaneously within the same environment. This will be especially useful if you attend a remote help session.
Open VS Code and click on the extensions button in the activity bar on the left side of the screen.
Search for “Live Share”
Select the official Live Share extension and click its “Install” button.
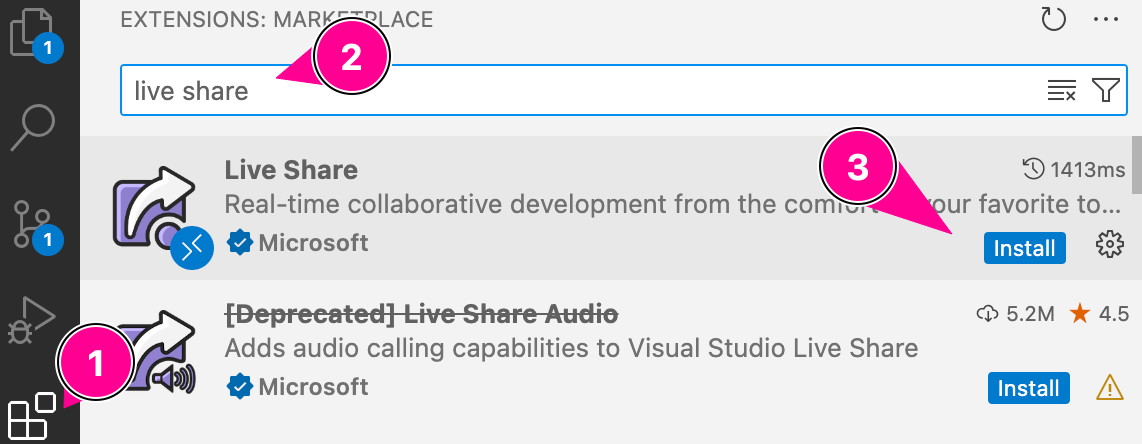
Fig. 5 A representation of Live Share Extension on VS Code.#
Starting a Collaborative Session#
From the VS Code menu bar, go to File -> Open Folder… to open the folder containing the files that you would like to collaborate on.
Click on the Live Share icon in the activity bar.
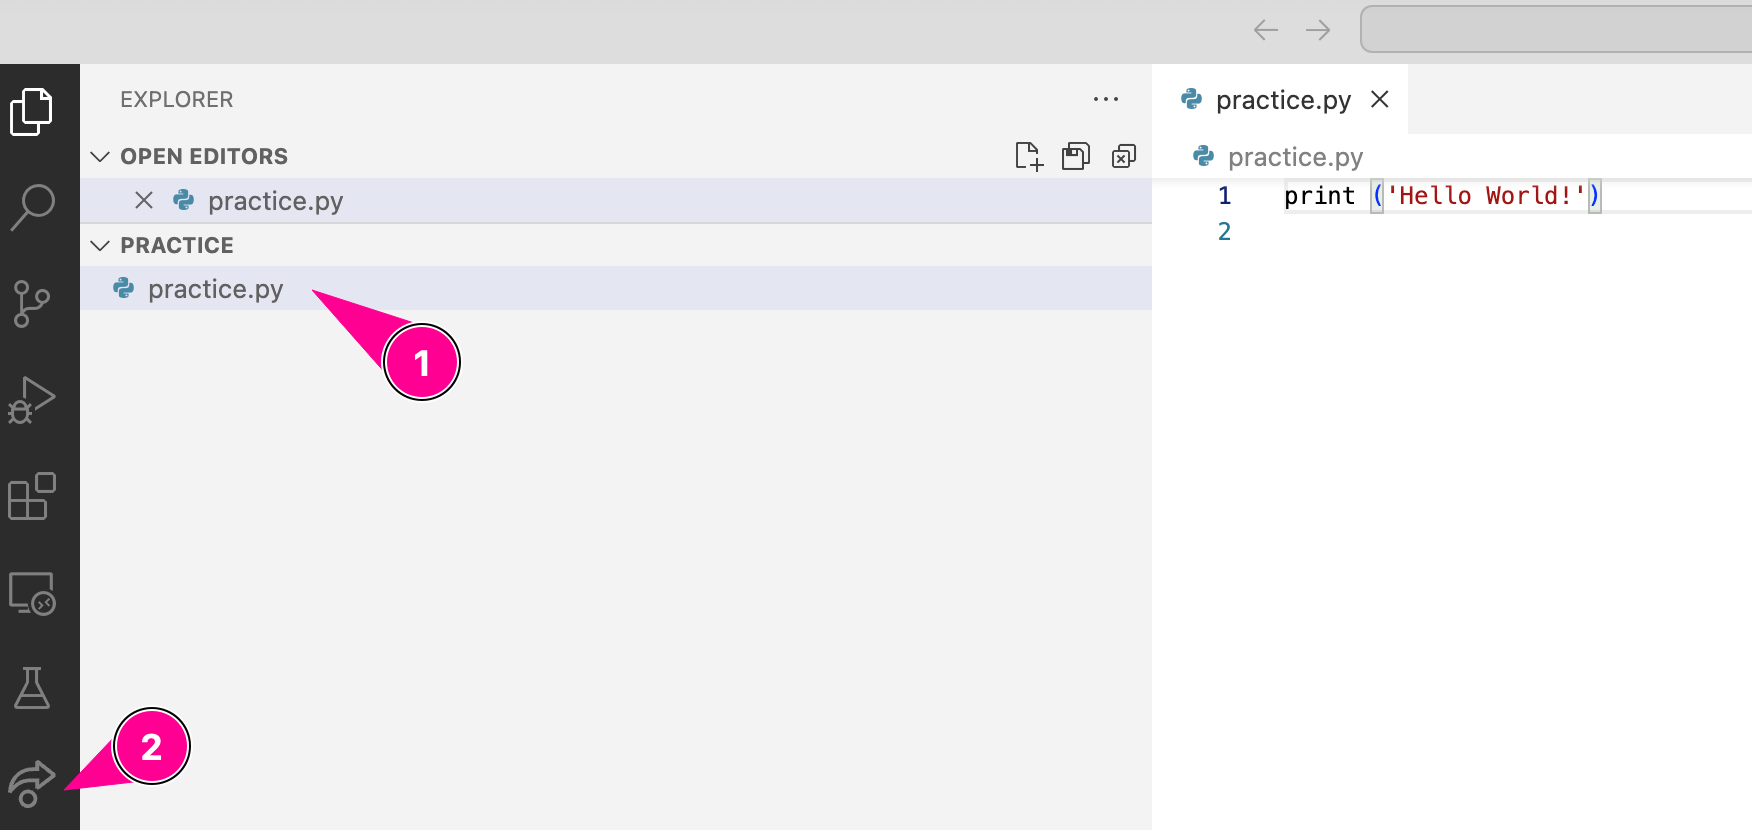
Fig. 6 A representation of Live Share Collaboration Steps on VS Code.#
Click on the “Share” button.
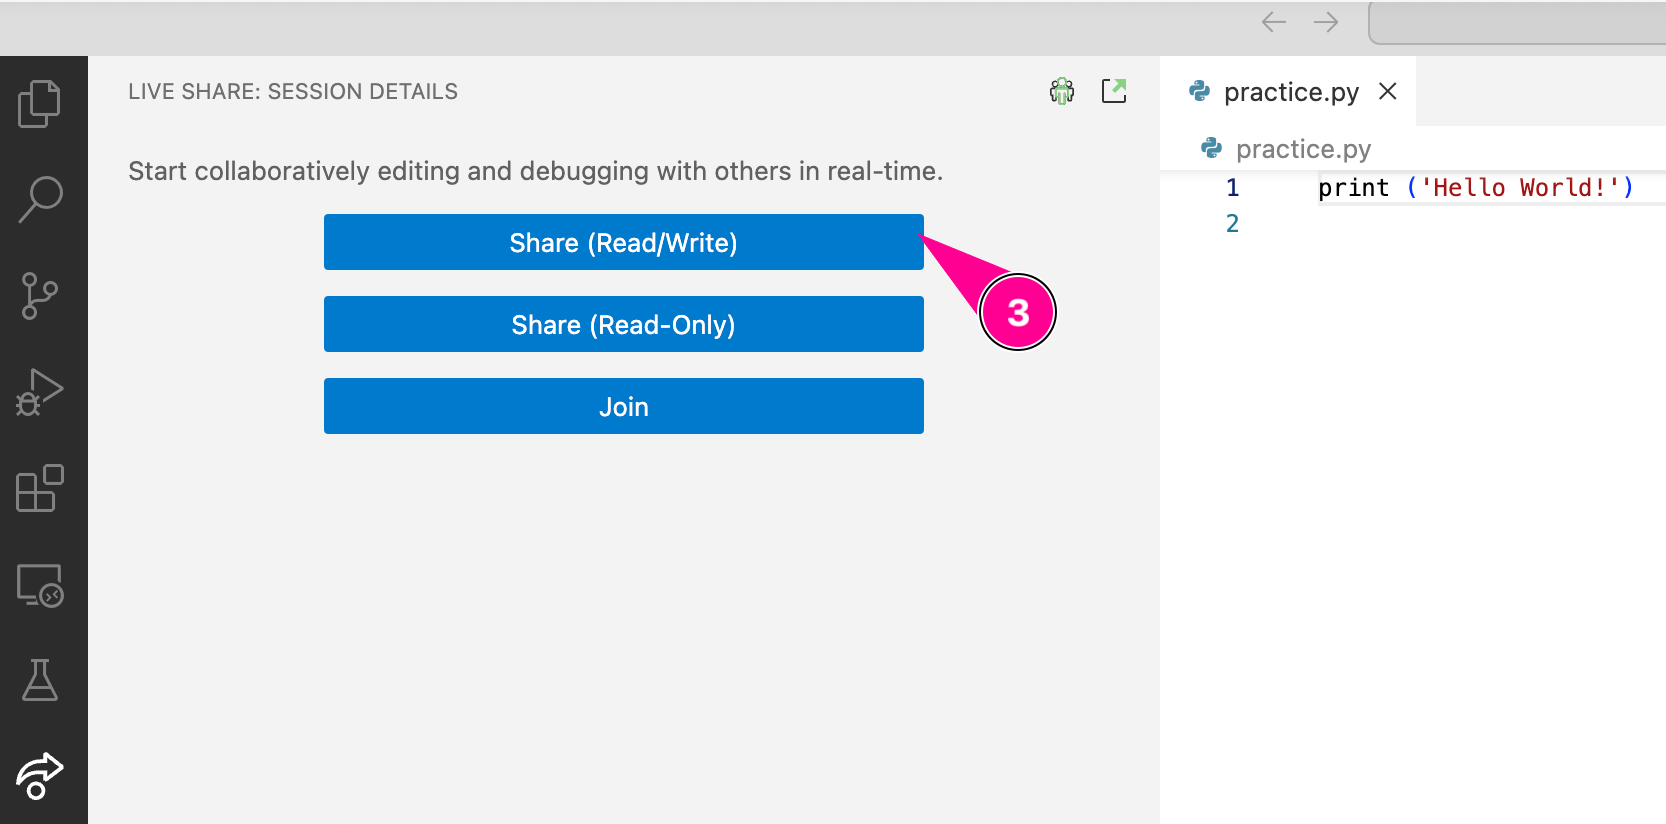
Fig. 7 A representation of Live Share Collaboration Steps on VS Code.#
You will need to sign in using a Microsoft account (e.g. your Purdue career account).
A link will be copied to your clipboard that you can send to a member of the teaching team.
The team member will click on the “Join” button and enter the link shared with them. Once it connects, they will be able to see and edit your files along with you in real-time.
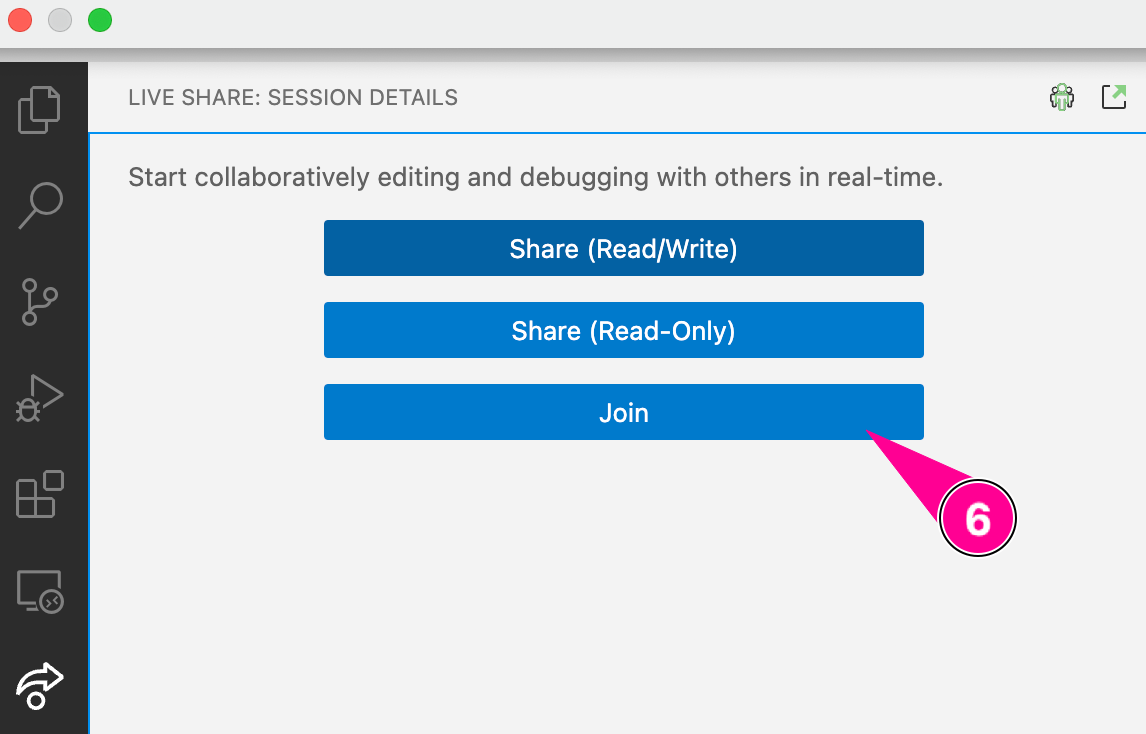
Fig. 8 A representation of Live Share Collaboration Steps on VS Code.#
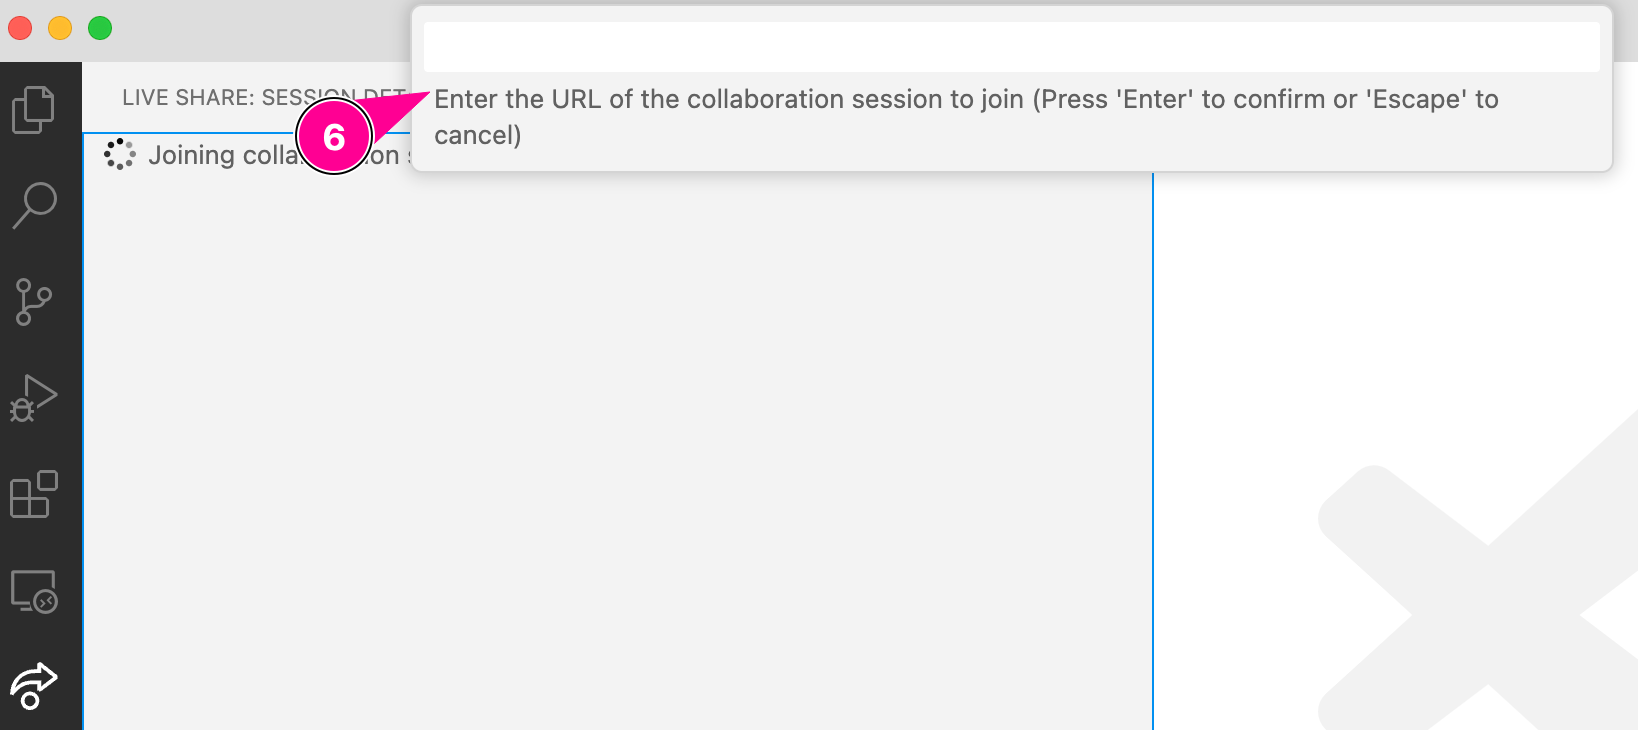
Fig. 9 A representation of Live Share Collaboration Steps on VS Code.#
Python (the recommended way)#
We will use Astral’s uv tool to manage our Python environments. Follow the steps below to install uv and Python on your system. You can read more about uv at https://docs.astral.sh/uv/
From the VS Code menu bar, go to Terminal -> New Terminal to open a terminal window in VS Code. Then run the appropriate command(s) below in the terminal to install
uv.Install
uvfor Mac OS/Linux.curl -LsSf https://astral.sh/uv/install.sh | sh
Or, if that command doesn’t work, try the following:
wget -qO- https://astral.sh/uv/install.sh | sh
Install
uvfor Windows.powershell -ExecutionPolicy ByPass -c "irm https://astral.sh/uv/install.ps1 | iex"
After installation, set the execution policy for PowerShell scripts to RemoteSigned by running the following command in your PowerShell terminal. This allows you to run locally created scripts without signing them, while still requiring that scripts downloaded from the internet are signed by a trusted publisher.
Set-ExecutionPolicy -Scope CurrentUser -ExecutionPolicy RemoteSigned
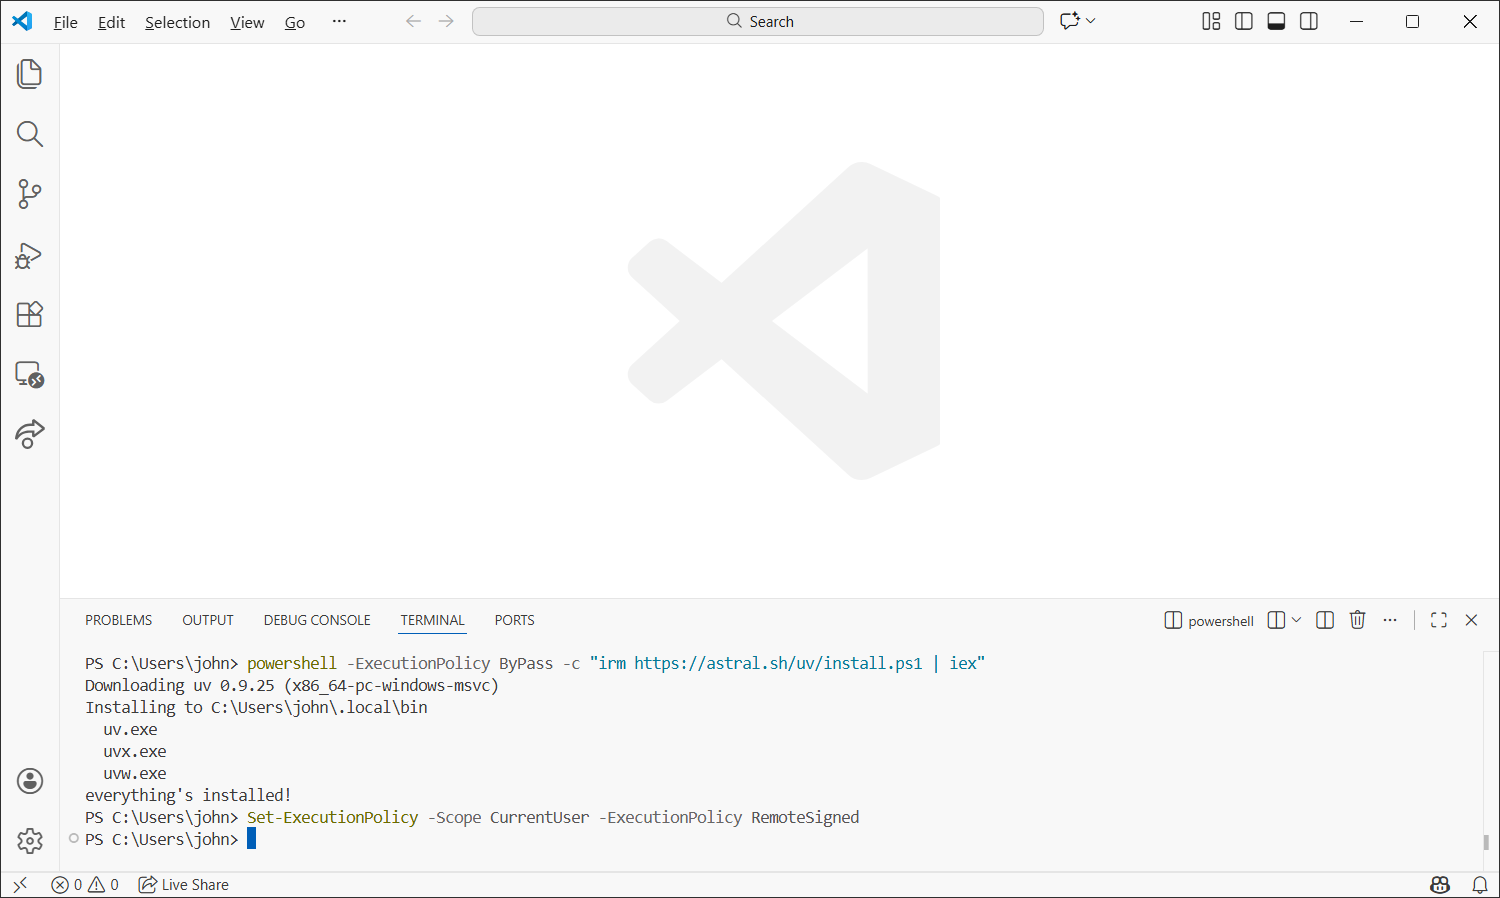
Fig. 10 A screenshot of VS Code with uv installation commands entered into the terminal.#
Close VS Code and then open it again. Then, in the new terminal, run the following command to install Python.
uv python install 3.13
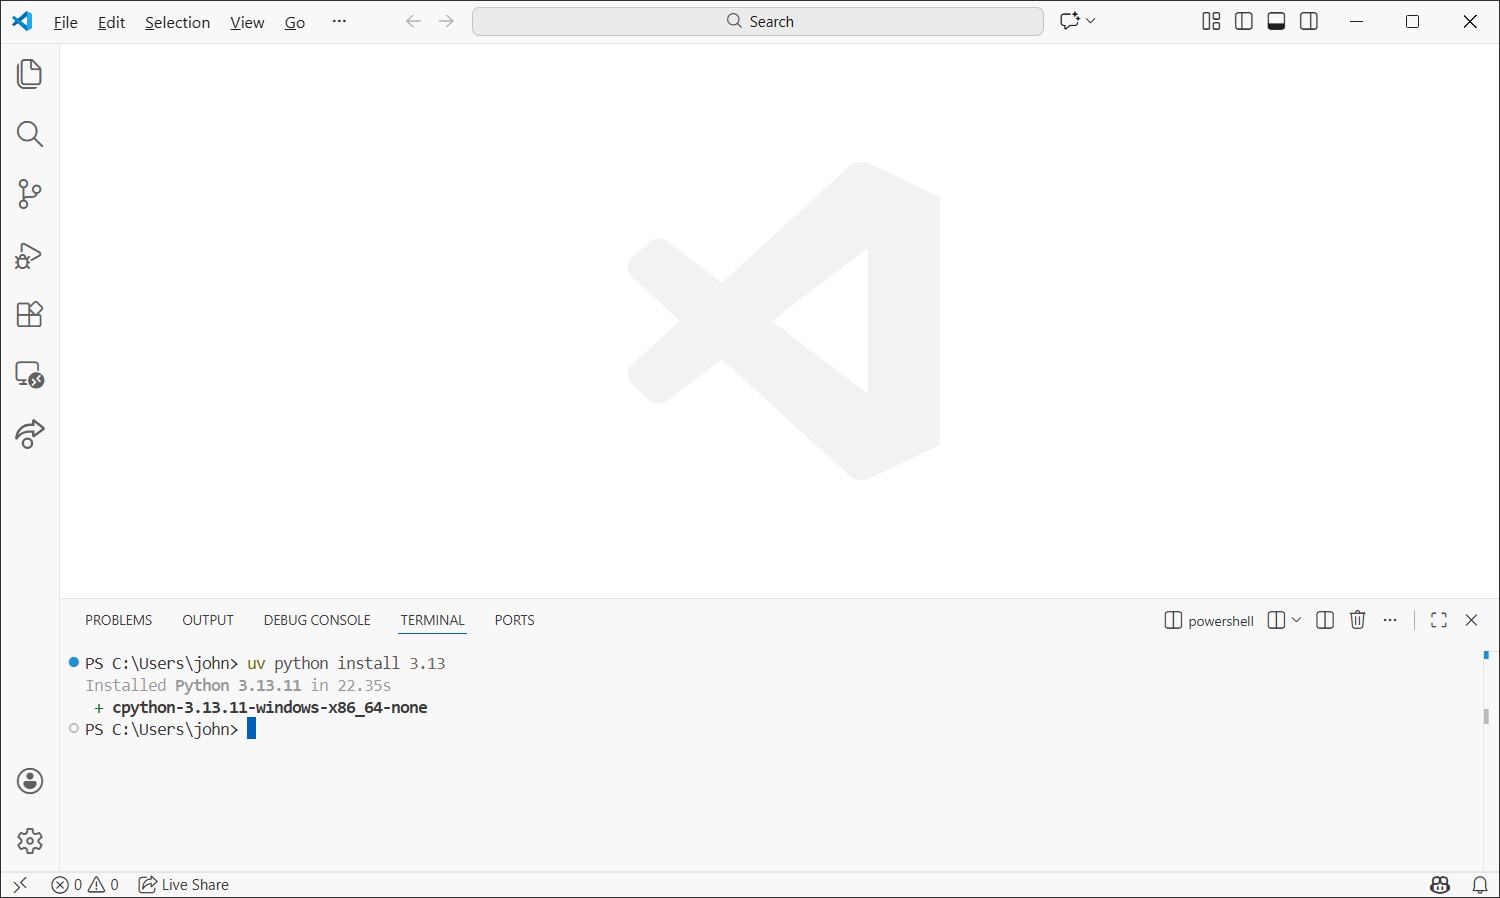
Fig. 11 A screenshot of VS Code with Python installation commands entered into the terminal.#
You can test that Python is installed correctly by running the following command
uv run python --version
You should see output similar to the following
Python 3.13.xx
Create a folder to contain all your EBEC course files. You can use the File Explorer(Windows) or Finder(Mac) to do this. Then in VS Code, open the folder you just created by selecting File -> Open Folder… from the menu bar.
Note
Make sure you open the folder you just created, and not just a single file inside that folder. This ensures that the virtual environment we are about to create will be stored inside this folder.
Virtual environments ensure that each of your projects has its own dependencies, preventing conflicts between different projects. In your VS Code terminal, run the following commands to initialize the folder as a uv project and set up a Python virtual environment within it. If you see a pop-up asking if you want to activate the new virtual environment, click “Yes”.
uv init
uv sync
To verify that the virtual environment is set up correctly, close your current terminal and open a new one, then run the following command
python --versionYou should see output similar to the following.
Python 3.13.xx
Note
Note that we no longer need to type
uv run pythonto use Python. The virtual environment we set up ensures that the correct Python version is used whenever we typepythonin this project folder.
Python (the traditional way)#
Open the Microsoft store
Search for Python 3.13
Click on “Get” to install the Python 3.13 interpreter
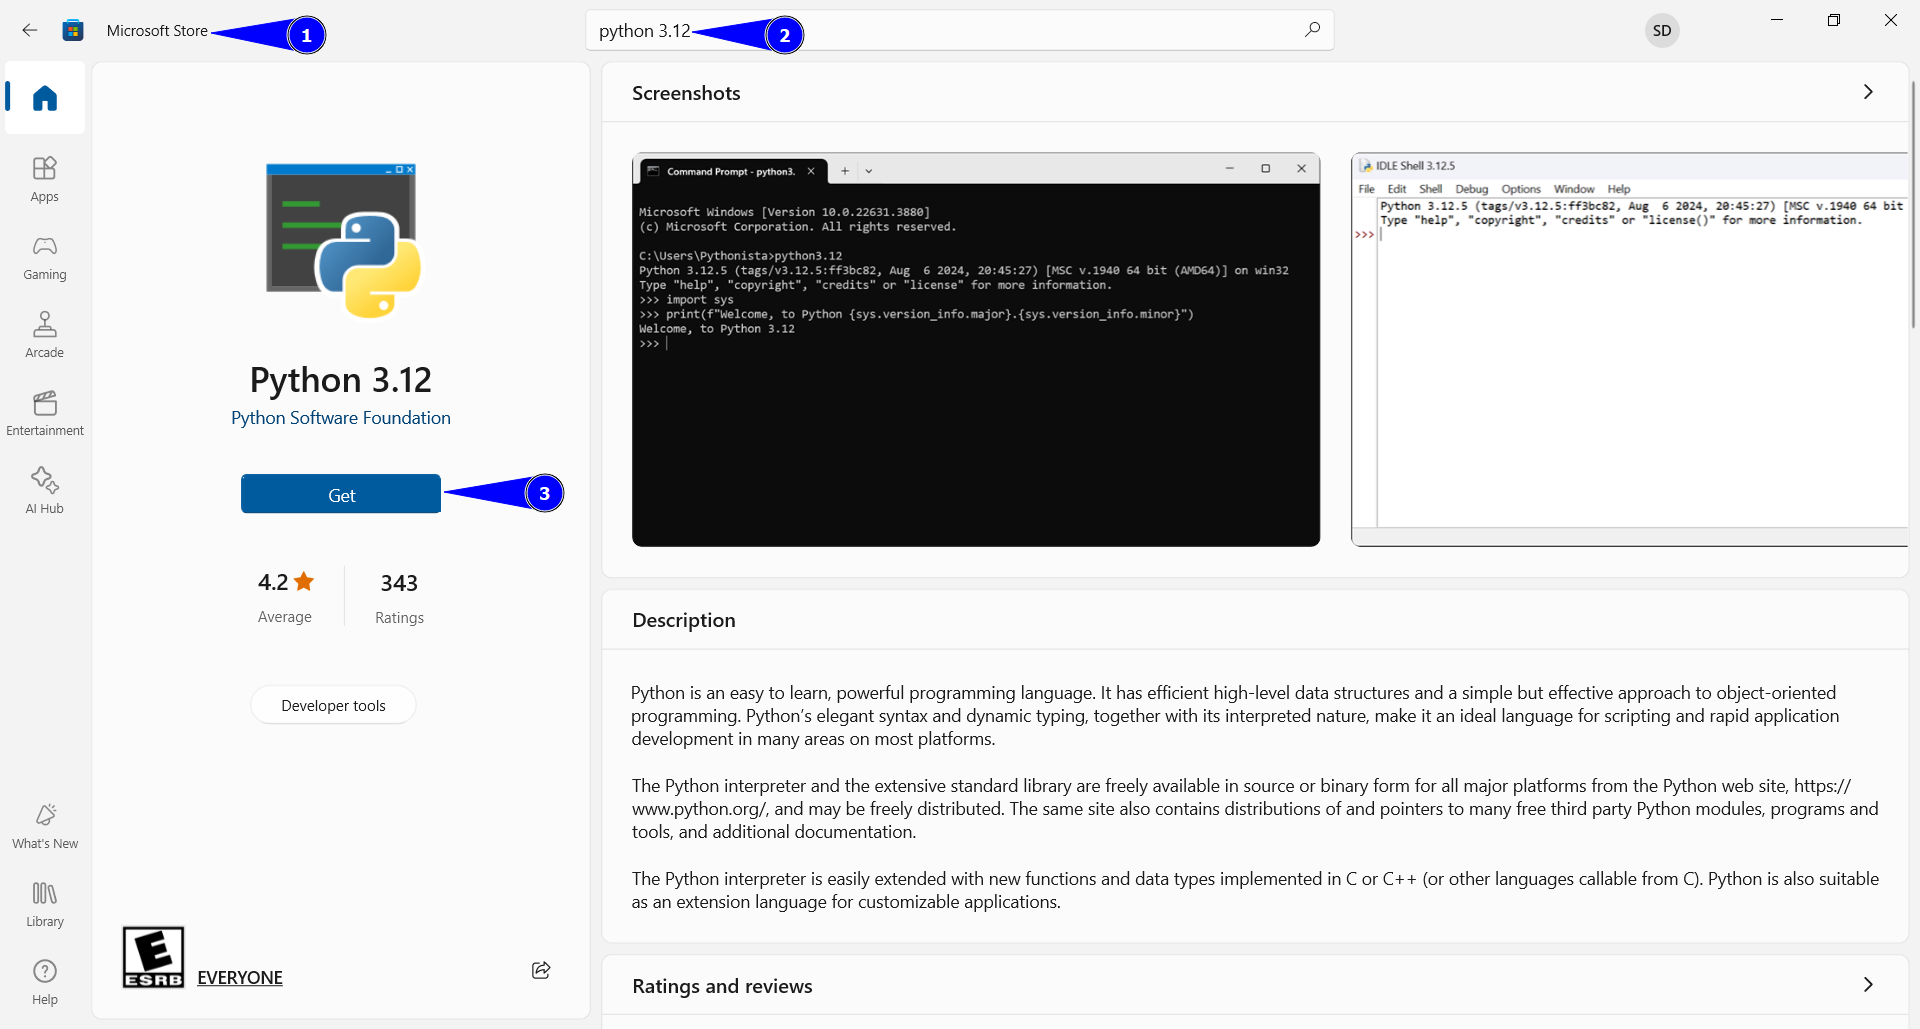
Fig. 12 A representation of Python Installation page on Windows Store.#
Download and install the latest release
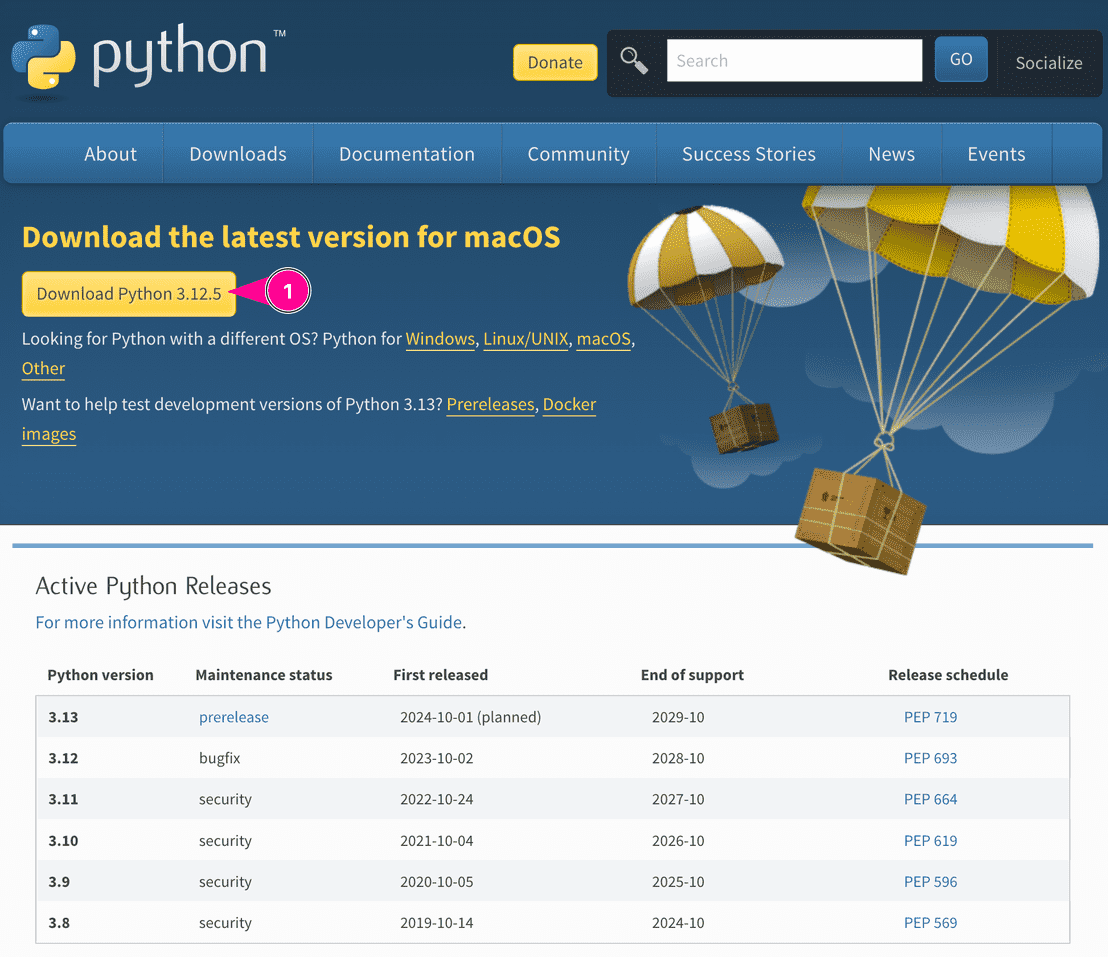
Fig. 13 A representation of Python Installation page on Mac.#

Fig. 14 A representation of Python Installation application on Mac.#
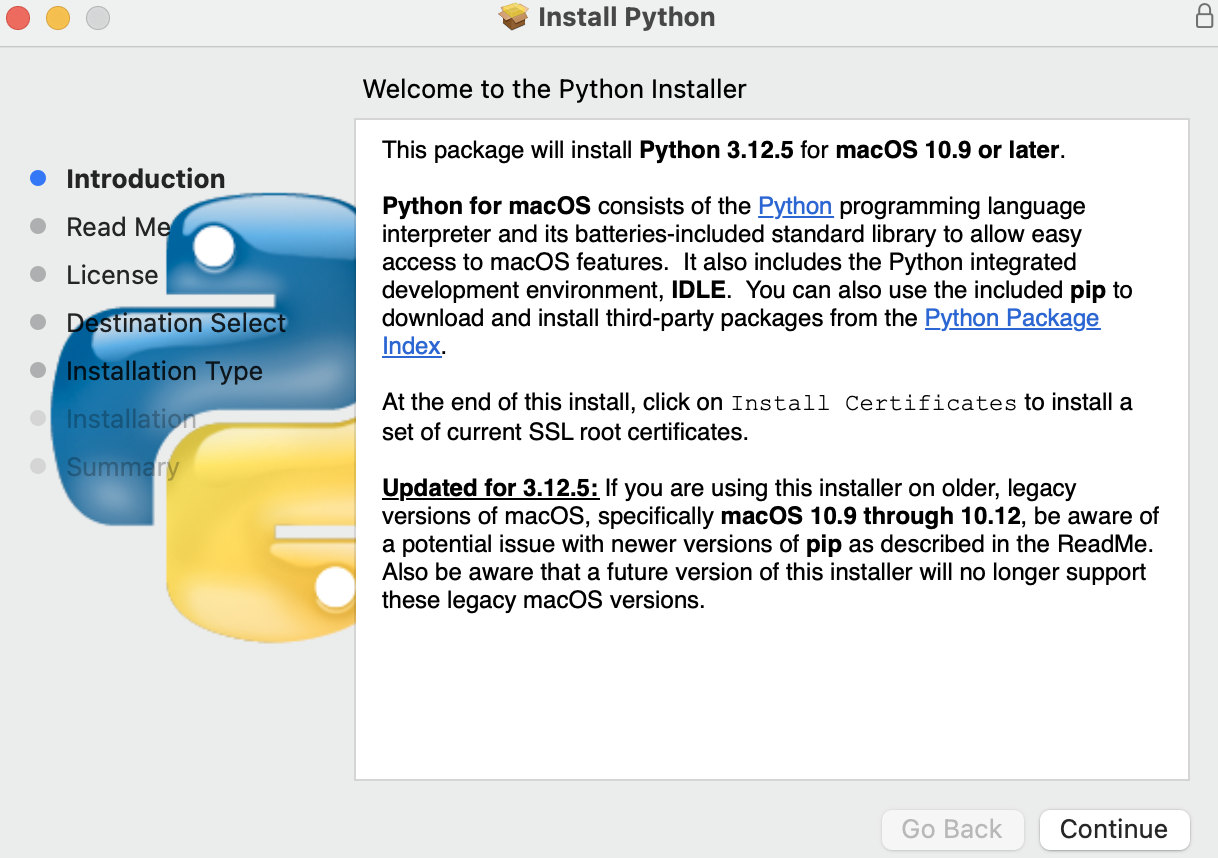
Fig. 15 A representation of Python Installation application on Mac.#
Installing Python
On Ubuntu, I recommend installing Python via the deadsnakes ppa. You can find details of the ppa here: https://launchpad.net/~deadsnakes/+archive/ubuntu/ppa. To install Python 3.13 enter the following in a terminal.
sudo add-apt-repository ppa:deadsnakes/ppa
sudo apt-get update
sudo apt install python3.13
For other Linux systems, use their package manager or, if that Python version is older than \(3.13\), download and install directly from python.org. Ask if you would like assistance setting up Python in a virtual environment.
Also note that you may need to type python3.13 whenever I type python in the lecture
videos.