Software Installation Steps#
Python#
Follow the steps below to install Python on your system.
Open the Microsoft store
Search for Python 3.12
Click on “Get” to install the Python 3.12 interpreter
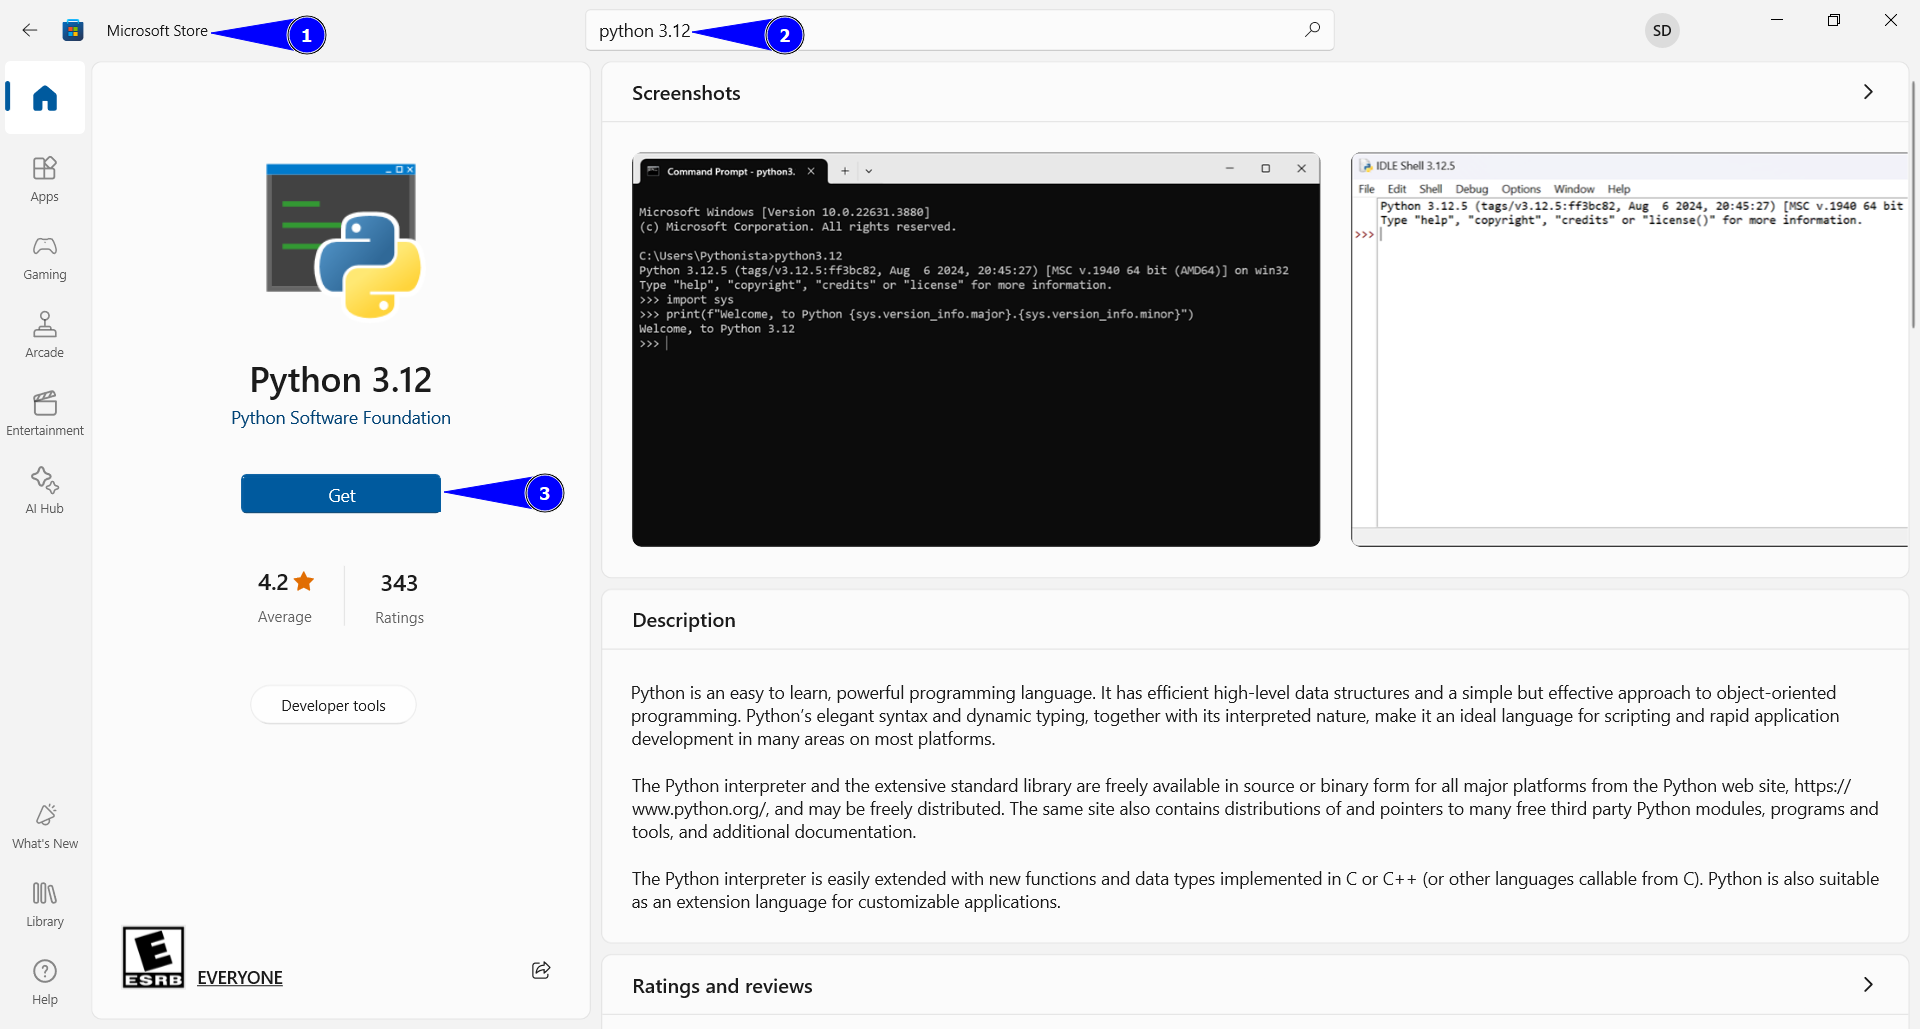
Fig. 2 A representation of Python Installation page on Windows Store.#
Download and install the latest release
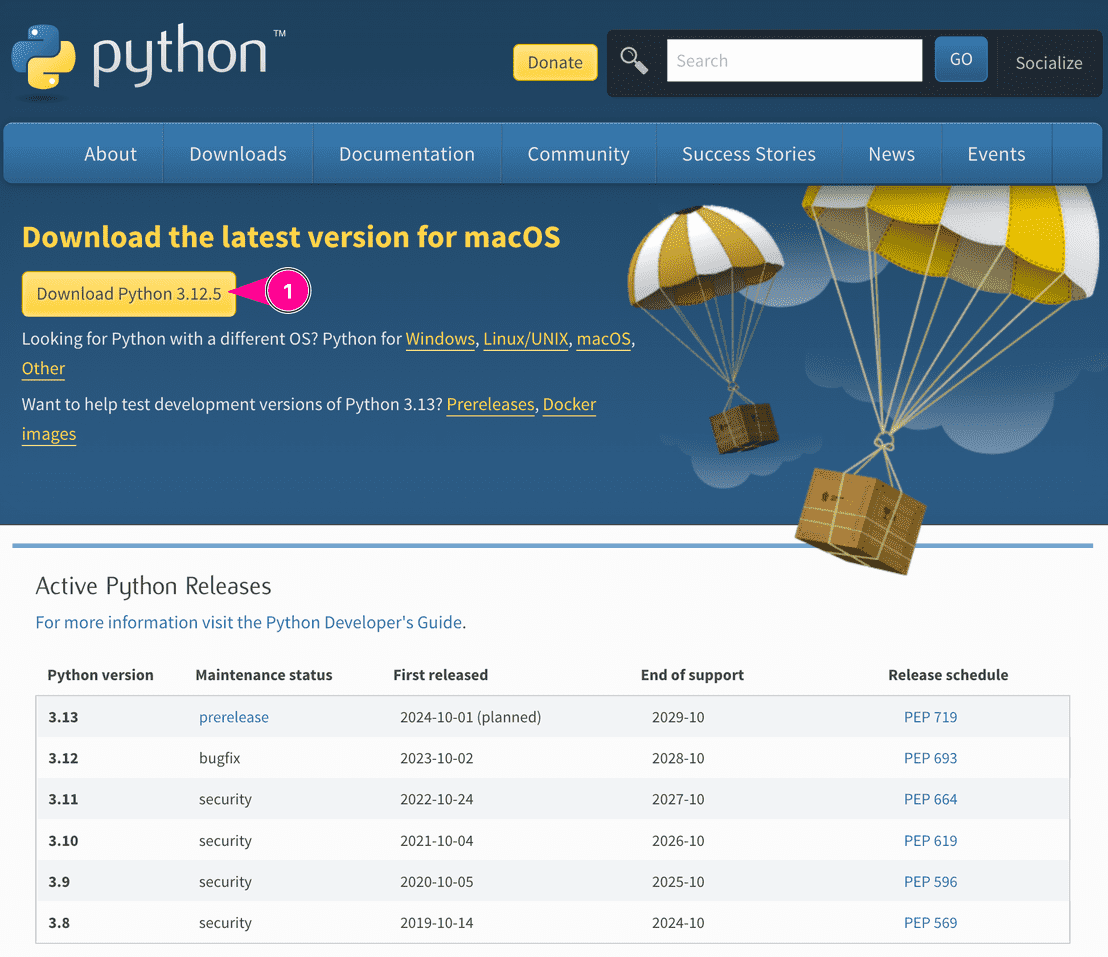
Fig. 3 A representation of Python Installation page on Mac.#

Fig. 4 A representation of Python Installation application on Mac.#
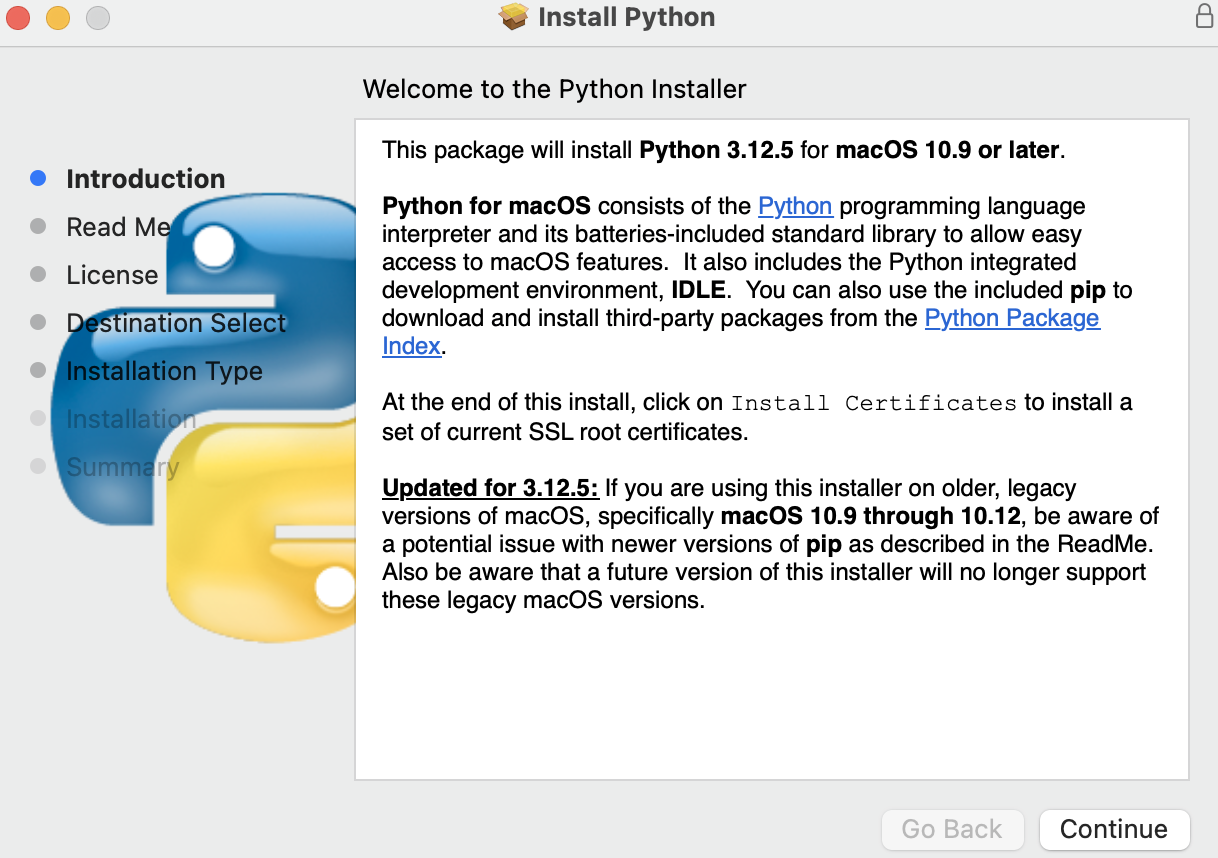
Fig. 5 A representation of Python Installation application on Mac.#
Installing Python
On Ubuntu, I recommend installing Python via the deadsnakes ppa. You can find details of the ppa here: https://launchpad.net/~deadsnakes/+archive/ubuntu/ppa. To install Python 3.12 enter the following in a terminal.
sudo add-apt-repository ppa:deadsnakes/ppa
sudo apt-get update
sudo apt install python3.12
For other Linux systems, use their package manager or, if that Python version is older than \(3.12\), download and install directly from python.org. Ask if you would like assistance setting up Python in a virtual environment.
Also note that you may need to type python3.12 whenever I type python in the lecture
videos.
VS Code#
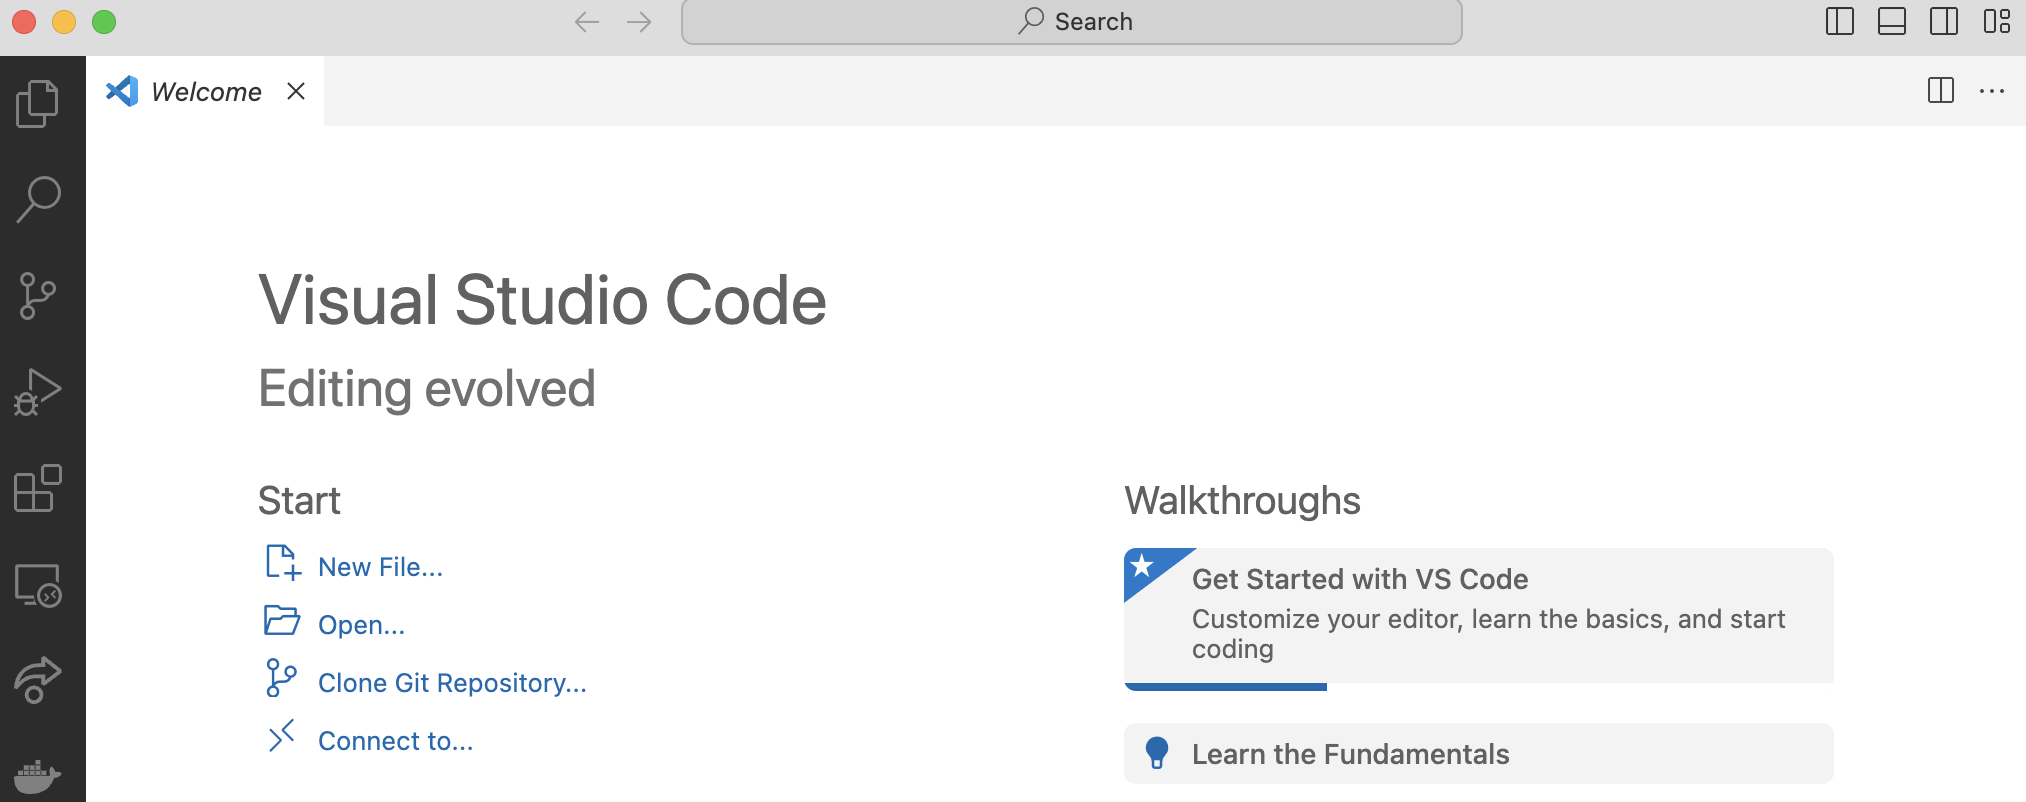
Fig. 6 A representation of VS Code Interface.#
Installing VS Code#
Download VS Code from https://code.visualstudio.com/download and choose your OS (Windows, Mac, or Linux).
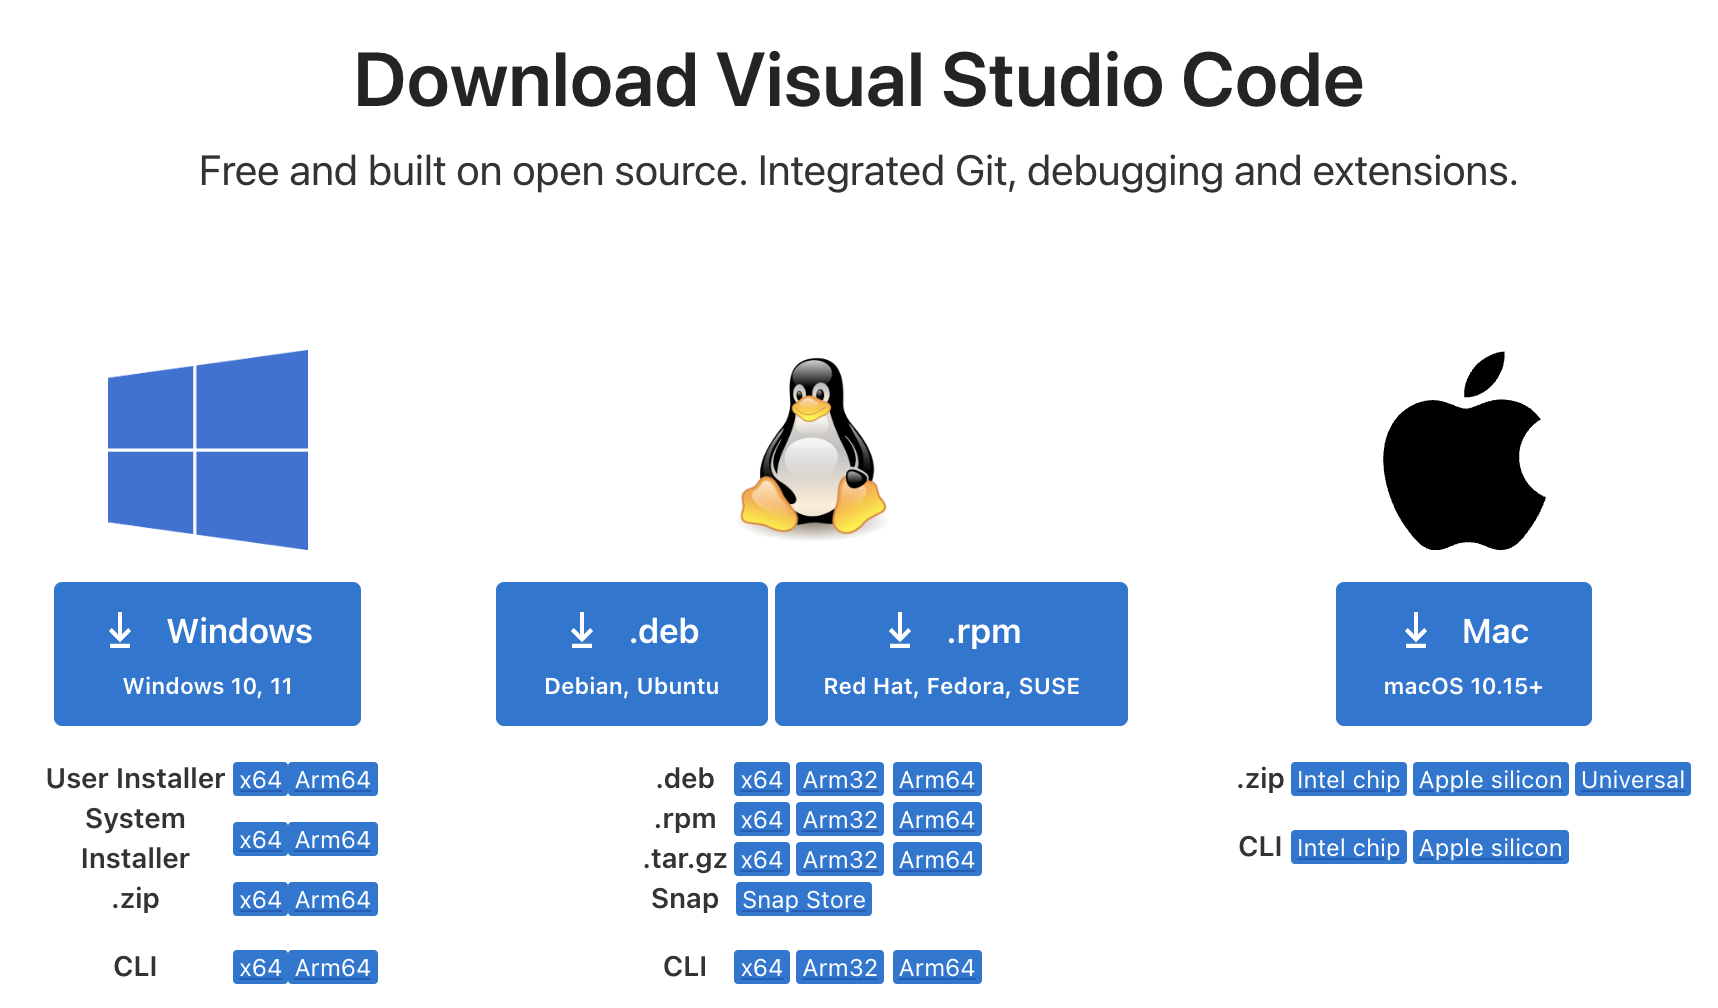
Fig. 7 A representation of VS Code Installation page.#
Important
Make sure you are installing Visual Studio Code, NOT Visual Studio.
Installing Python Extension#
Python extension in VS Code is useful because it enhances code development with features like syntax highlight, smart code suggestions, integrated debugging, and linting to catch errors early. It also supports virtual environments and Jupyter Notebooks, making it a comprehensive tool for Python programming.
Open VS Code and go to the extensions tab on the left side of the screen.
Search for “Python”
Install the official Python extension.
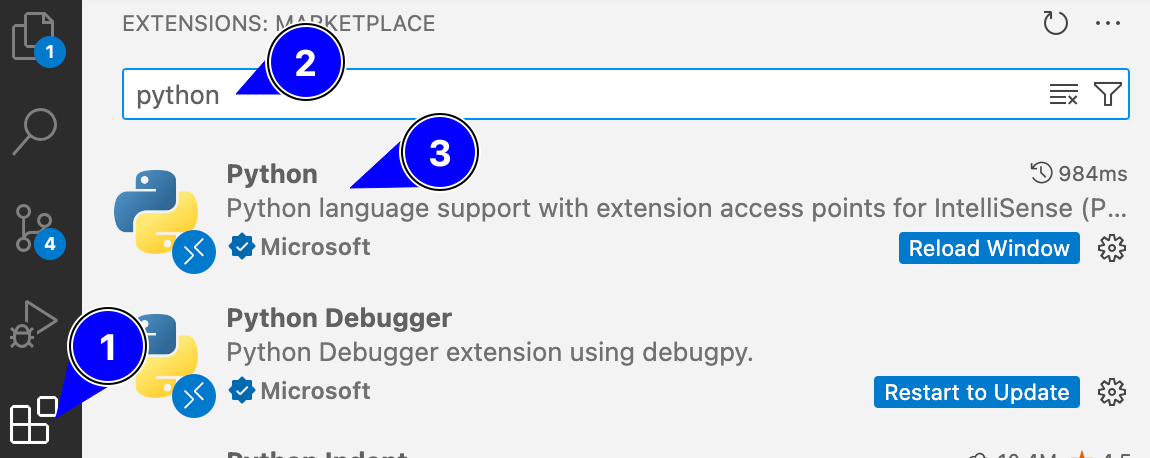
Fig. 8 A representation of Python Extension Installation steps on VS Code.#
Collaborating in VS Code#
Installing the Live Share Extension#
Live Share extension in VS Code is useful because it enables real-time collaboration by allowing multiple developers to share and edit code simultaneously within the same environment. It supports shared debugging sessions, terminal access, and even audio calls, making it an essential tool for remote teamwork and pair programming.
Open VS Code and go to the extensions tab on the left side of the screen.
Search for “Live Share”
Install the official Live Share extension.
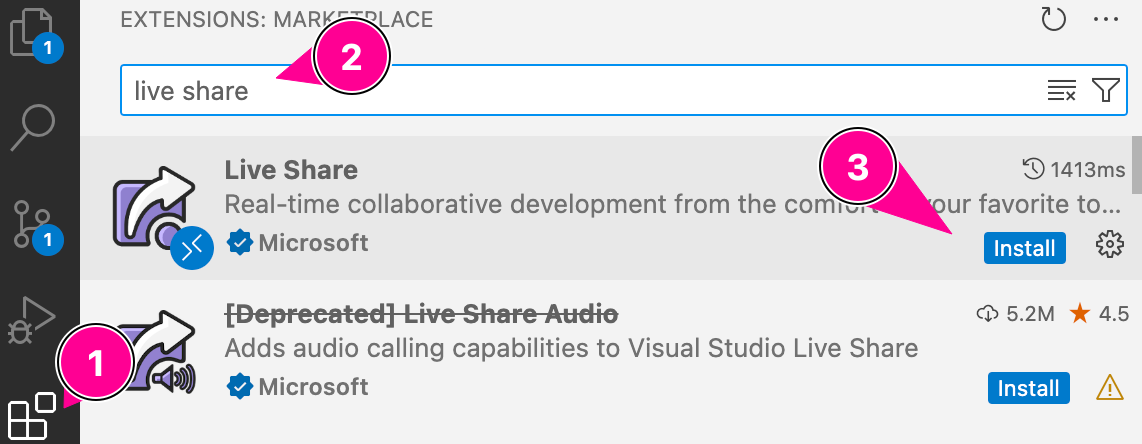
Fig. 9 A representation of Live Share Extension on VS Code.#
Starting a Collaborative Session#
Open a file or folder that you would like to collaborate on.
Go to the live share button on left-hand bar.
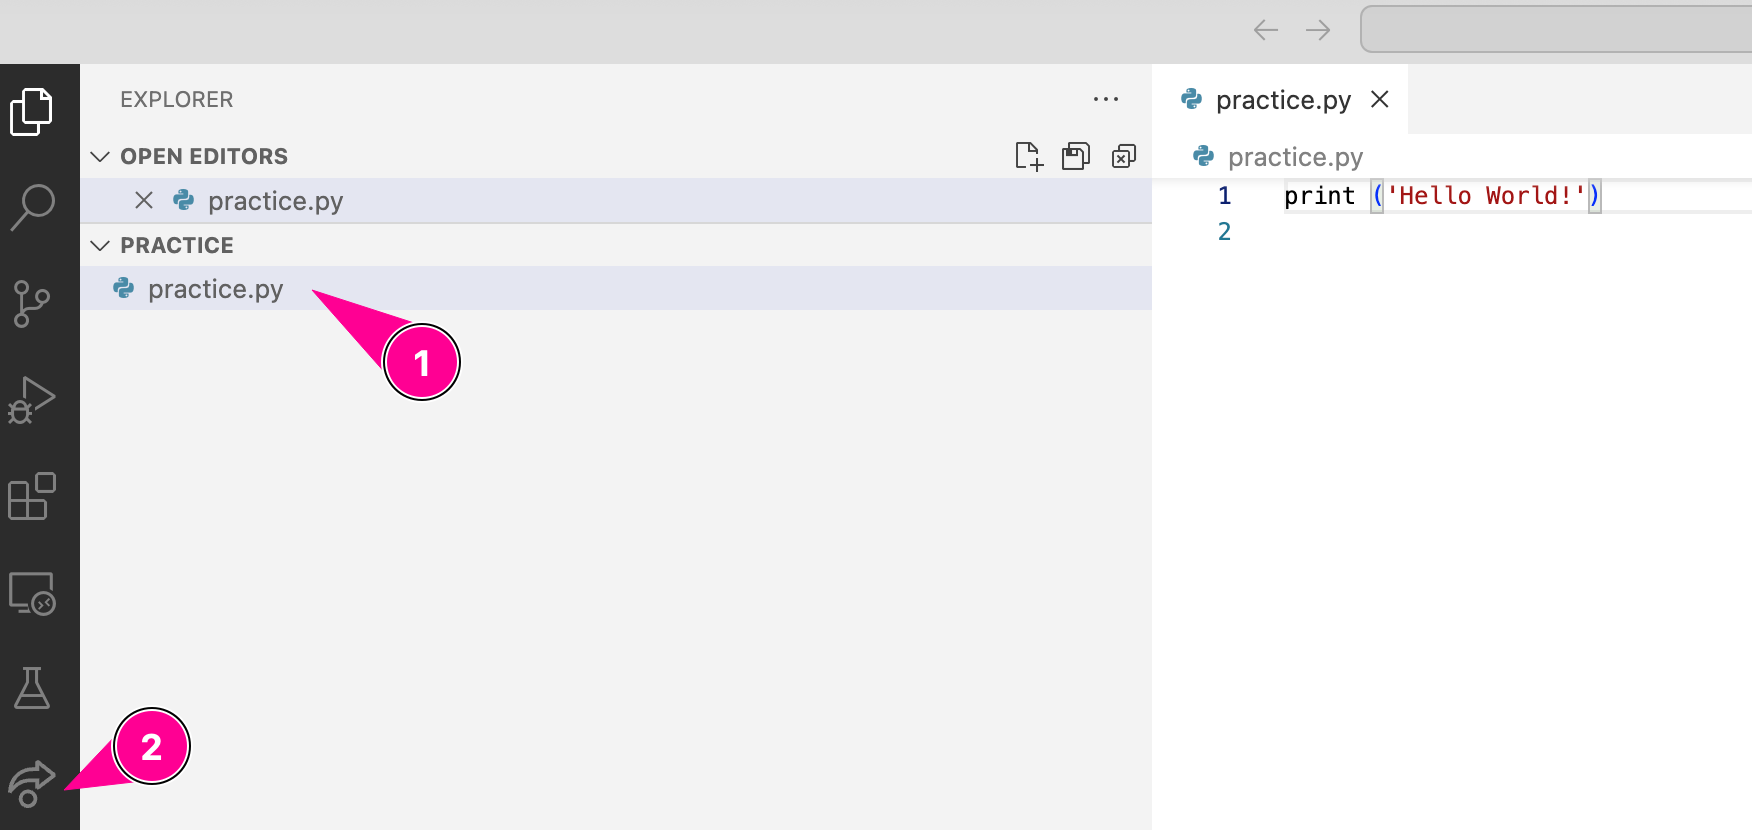
Fig. 10 A representation of Live Share Collaboration Steps on VS Code.#
Click on the “Share” button.
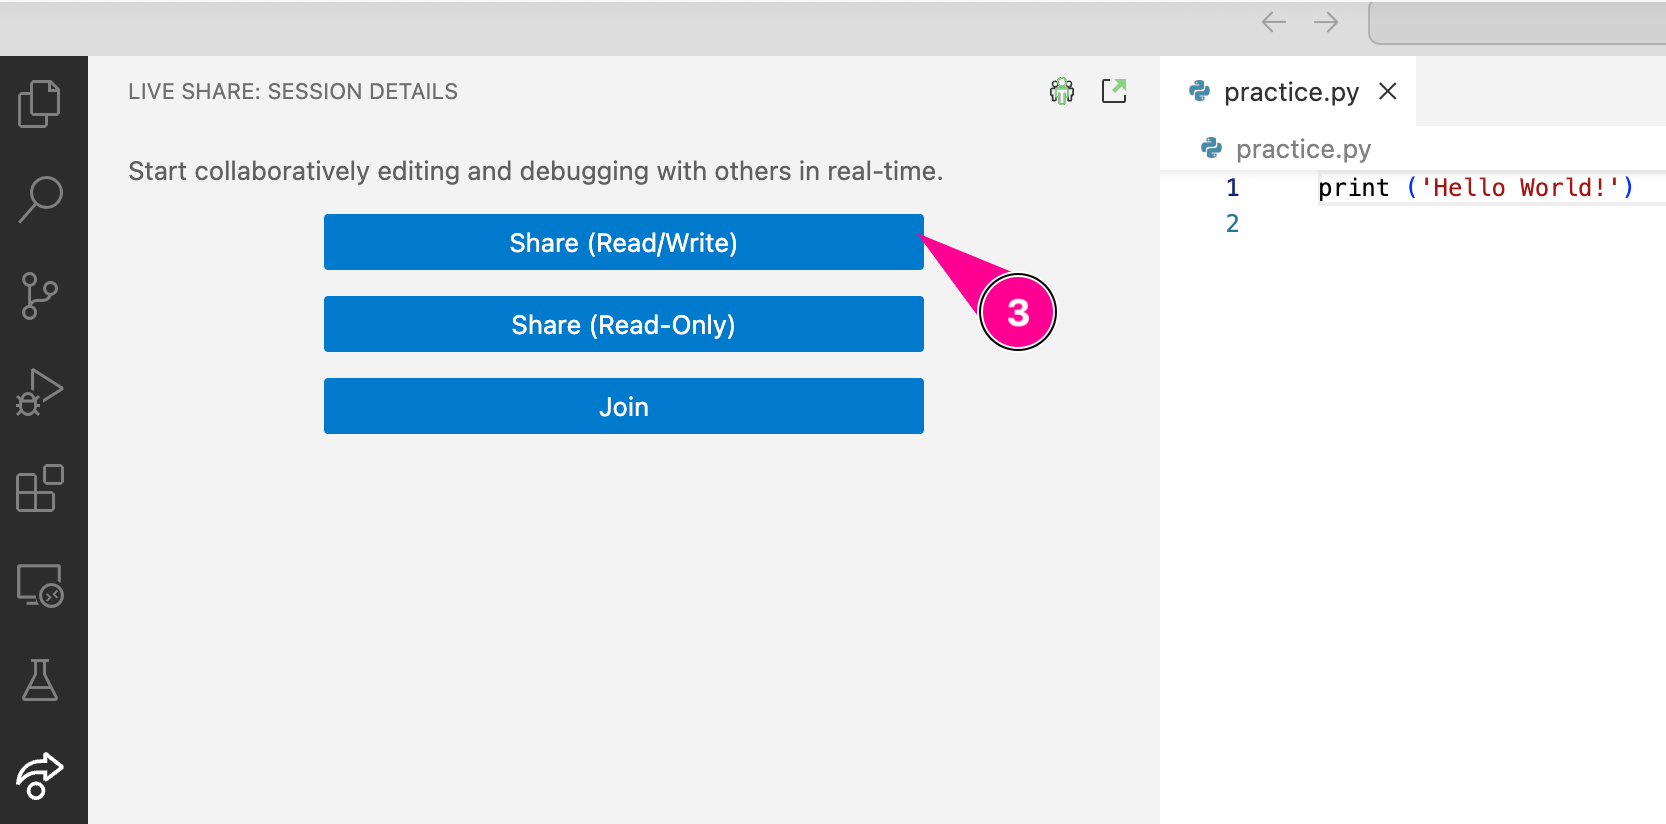
Fig. 11 A representation of Live Share Collaboration Steps on VS Code.#
You will need to sign in using a Microsoft account (e.g. your Purdue career account).
A link will be copied to your clipboard that you can send to your team members to begin collaborating.
If you are the one joining, click on “Join” button and enter the link shared to you.
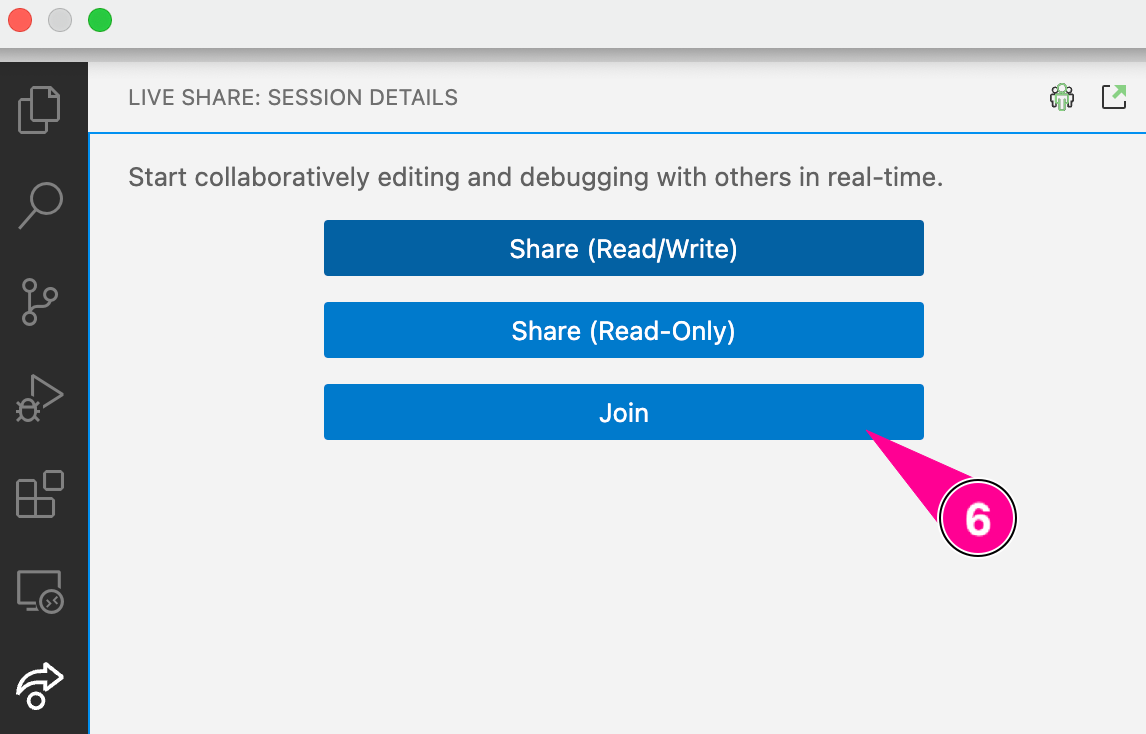
Fig. 12 A representation of Live Share Collaboration Steps on VS Code.#
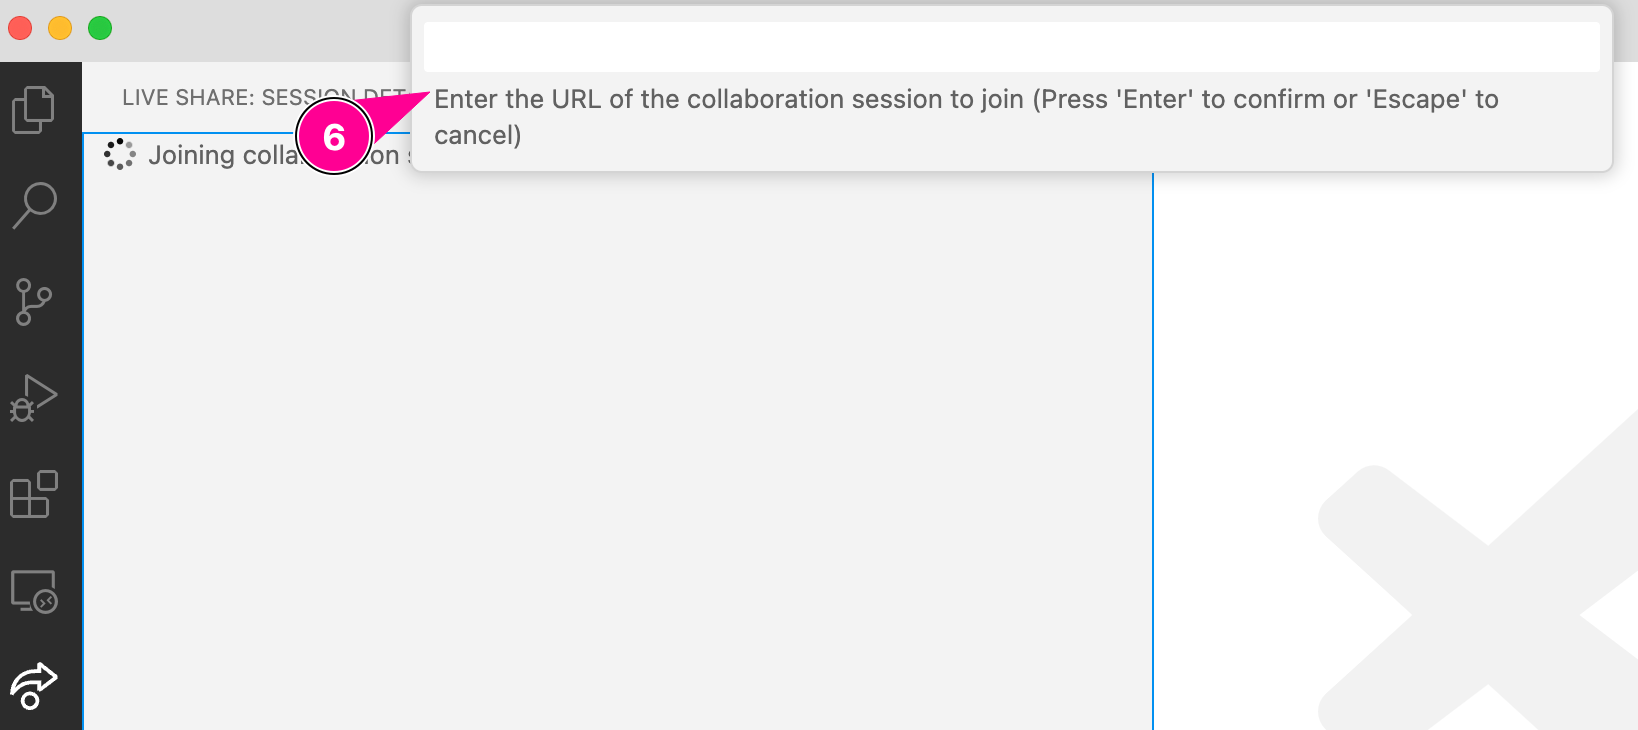
Fig. 13 A representation of Live Share Collaboration Steps on VS Code.#